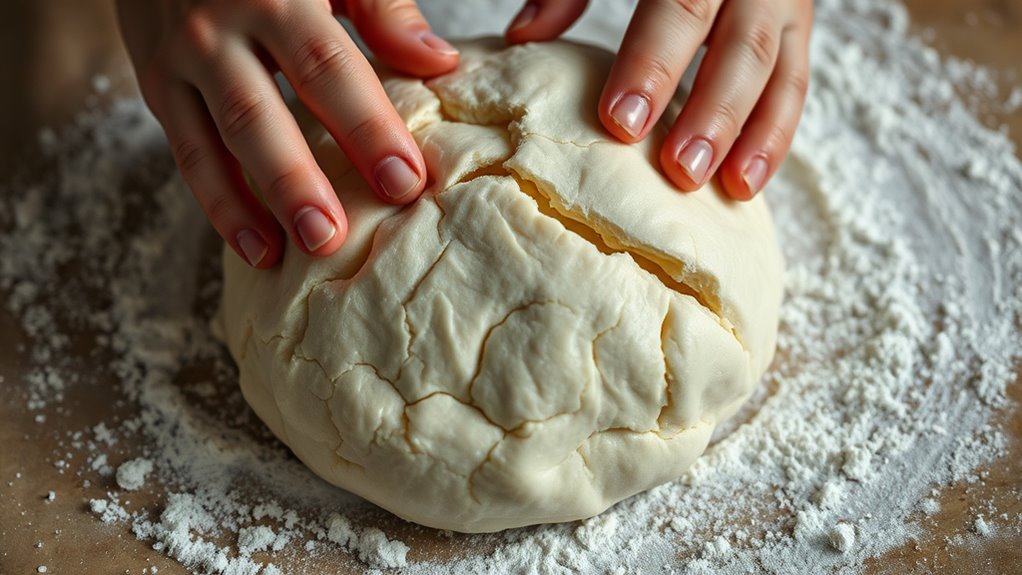

When tears or holes form while stretching dough, handle it gently by pinching edges and pressing them back together, then stretch slowly with less force to avoid further damage. Keep your dough at room temperature and lightly dust the surface to prevent sticking and tearing. Practice gentle, even stretching, and rest the dough if it feels too elastic or sticky. More tips will help you master smooth shaping without tears.
Key Takeaways
- Gently pinch and press torn edges back together, then continue stretching with less force.
- Rest the dough briefly to relax gluten and reduce tension causing tears.
- Use minimal, even pressure and rotate dough gradually to prevent over-stretching.
- Lightly flour the surface to improve grip and prevent sticking that leads to tears.
- Practice patience and gentle handling to build dough strength and reduce holes during shaping.
Stretching dough can be tricky, especially when tears and holes start to form. It’s a common challenge, but understanding dough elasticity and mastering shaping techniques can make all the difference. The key is to work with the dough’s natural stretchability, not against it. When dough is elastic, it’s more responsive and less prone to tearing. To improve dough elasticity, guarantee you’ve kneaded it sufficiently—proper kneading develops the gluten structure that gives dough its stretch and strength. If your dough feels resistant, let it rest for 10 to 15 minutes; this relaxes the gluten, making it easier to stretch without tearing.
Work with dough’s natural elasticity; proper kneading and resting prevent tears and holes.
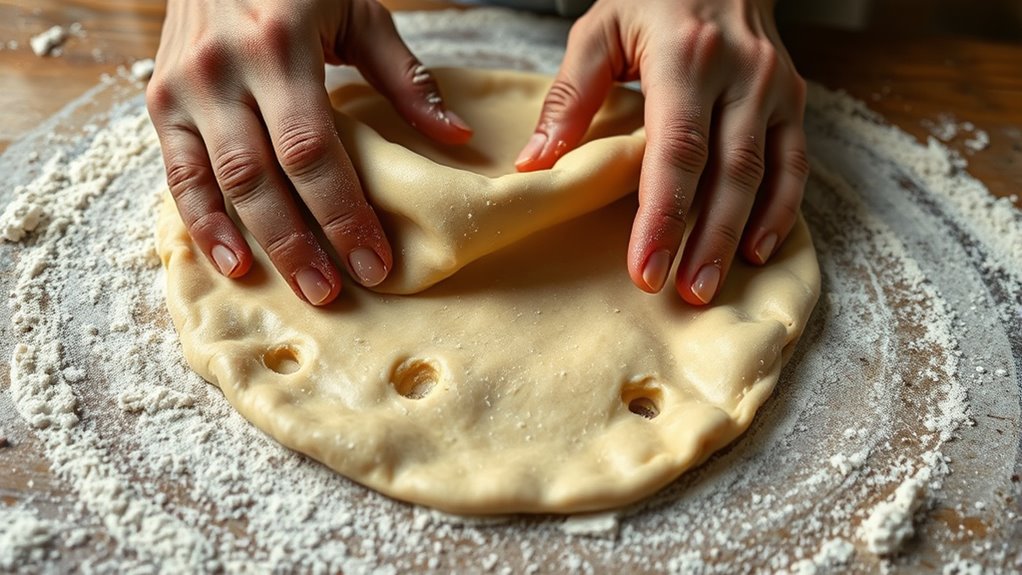
When you begin shaping, use gentle, even pressure to stretch the dough. Instead of trying to force it into shape all at once, start from the center and gradually work outward. This technique helps distribute tension evenly, reducing the risk of tears. If you notice the dough resisting or starting to thin unevenly, pause and let it rest for a few minutes. Rest periods allow the gluten to relax further, giving you more control and preventing holes from forming.
Pay close attention to your shaping techniques. Instead of tossing or aggressively stretching, use your hands to gently pull and rotate the dough. This controlled approach lets you feel where the dough is elastic enough to stretch further and where it’s weaker. If tears begin to develop, don’t panic—simply patch them up. Lightly pinch the tear edges together and gently press them back into the dough, then continue stretching with less force. Being patient and careful during this process helps maintain the dough’s integrity.
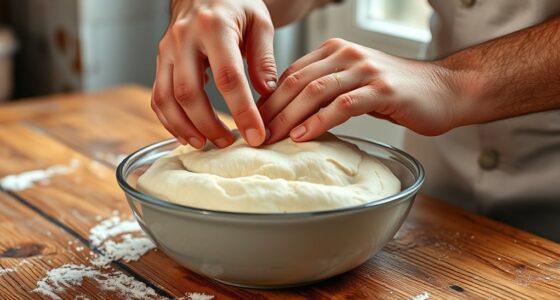
Another useful trick is to keep your dough at the right temperature. Too cold, and it won’t stretch easily; too warm, and it may become sticky and difficult to handle. Ideally, keep it at room temperature—around 70°F (21°C)—for maximum elasticity. Also, don’t forget to flour your surface lightly. A dusting prevents sticking, which can cause tears when you try to stretch or move the dough. Use just enough flour to keep things manageable without making the dough too dry or tough.
Mastering dough elasticity and refining your shaping techniques are vital to avoiding tears and holes. With patience and practice, you’ll develop a feel for how much tension your dough can handle. Remember, gentle, even stretching and proper resting are your best tools. Over time, you’ll gain confidence, and tearing will become a thing of the past as your dough becomes more responsive and resilient to handling.
Frequently Asked Questions
Can Certain Flours Prevent Dough Tears During Stretching?
Yes, certain flours can help prevent dough tears during stretching. Flours with higher protein content promote better gluten development, resulting in stronger, more elastic dough. You might consider ingredient substitutions like bread flour or high-gluten flour instead of all-purpose flour. These options enhance elasticity, making it easier to stretch without tearing, giving you a smoother dough-handling experience and better final texture.
How Does Dough Hydration Affect Its Elasticity and Tearing?
Higher hydration levels make your dough more elastic, allowing it to stretch without tearing. When you increase hydration, the gluten develops better, giving the dough flexibility and strength. Conversely, low hydration results in a stiffer dough that tears easily. Adjust hydration carefully—aim for a balance where the dough feels tacky but not sticky. Proper hydration enhances dough elasticity, reducing tears and holes during stretching.
What Techniques Can Help Fix Small Tears in Dough?
You can effectively fix small tears in dough by gently patching them with a bit of dough from the edges. Using proper tear prevention techniques, like dough conditioning with resting periods, reduces the chance of tears. To repair, lightly moisten the torn area, press the patch in place, and shape it smoothly. This maintains elasticity and prevents further tearing, ensuring a seamless, even crust for your baked goods.
Does Dough Resting Time Influence Its Stretchability?
Yes, resting time influences dough’s stretchability. When you let dough ferment, gluten develops, making it more elastic and easier to stretch. Longer resting periods allow gluten strands to strengthen and relax, reducing tears and holes. So, if you want smoother stretching and fewer tears, give your dough ample resting time, ideally after initial kneading and during proofing. This improves flexibility, making your dough much easier to work with.
Are There Specific Tools That Reduce Dough Tearing Risks?
Tools like a bench scraper, dough scraper, or a gentle silicone spatula can greatly reduce tearing risks. These tools help you handle dough delicately, especially when it’s at the ideal dough temperature for perfect gluten development. By supporting the dough’s stretchability with these tools, you prevent tears and holes, making your baking process smoother and more satisfying. Remember, gentle handling and proper tools make all the difference!
Conclusion
Remember, dough is like a tender canvas—you can mend tears and patch holes with gentle hands and patience. Each stretch might reveal a flaw, but don’t let it deflate your confidence. Instead, see it as a dance of resilience, where imperfections become part of the masterpiece. With careful attention and a soft touch, you’ll transform flaws into features, turning your dough into a resilient work of art—flawed, beautiful, and uniquely yours.