To balance top and bottom heat and prevent burnt crusts, start by adjusting your oven rack placement—try moving it to a middle position for more even heat. Use an oven thermometer to monitor temperatures accurately, and preheat a baking stone or sheet to help distribute heat better. If the crust browns too quickly, cover it with foil partway through baking. Mastering these tricks will help you achieve crispy, evenly baked results; learn more to perfect your technique.
Key Takeaways
- Use an oven thermometer to monitor and adjust overall temperature for even heat distribution.
- Position the oven rack in the middle to promote balanced top and bottom heat exposure.
- Preheat a baking stone or heavy sheet to help transfer consistent heat to the crust.
- Cover the crust with foil midway through baking to prevent over-browning from top heat.
- Rotate baked goods during baking to mitigate hot spots and ensure even browning on all sides.
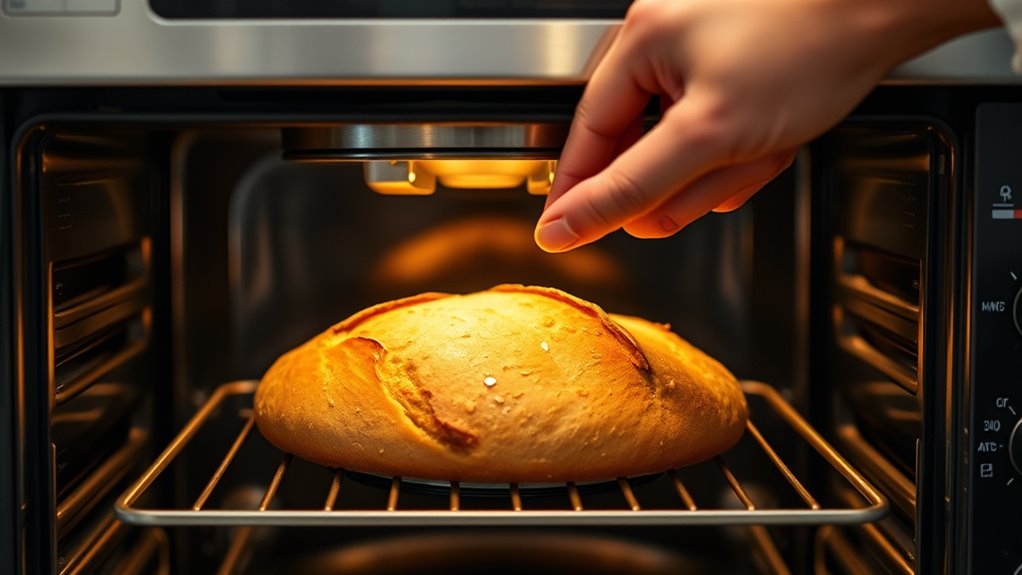
Achieving a perfect crust on baked goods often hinges on controlling the heat. When you’re baking, the oven temperature plays a vital role in how your crust develops. Too high, and you risk burning the outside before the interior is fully cooked; too low, and your crust may turn out pale and lack that desirable crunch. Setting the right oven temperature isn’t just about following a recipe—it’s about understanding how heat interacts with your specific oven and the type of baked good you’re making. Many home ovens can have hot spots or temperature fluctuations, so it’s wise to use an oven thermometer to accurately monitor the heat. Adjusting the temperature slightly, based on your observations, can help you achieve a more evenly baked crust. Additionally, knowing how your oven’s heat distribution behaves can assist in preventing uneven baking and burning. Baking duration also considerably impacts the final outcome. Even if your oven temperature is spot-on, leaving your baked goods in the oven for too long can lead to a burnt crust, especially on the bottom. Conversely, removing them too early can result in a pale, underdeveloped crust. To get it just right, keep a close eye on the baking time recommended in your recipe, but don’t rely solely on it. Use visual cues—like a deep golden color or a firm, crisp edge—to determine when it’s done. Remember, every oven is different, and factors like humidity or altitude can influence baking times. It’s often better to start checking your baked item a few minutes before the minimum time and then gauge its progress. To prevent burning, you can also experiment with baking techniques that balance heat distribution. For instance, using a baking stone or preheating your baking sheet can help promote even heat transfer, reducing hot spots that cause burning. Another trick is to adjust the oven rack position—placing your tray in the middle usually provides a more balanced heat environment, avoiding direct bottom heat that can scorch your crust. If you notice the crust browning too quickly, lowering the oven temperature slightly or covering the baked goods loosely with foil partway through can help prevent over-browning. Ultimately, mastering the balance between oven temperature and baking duration requires some trial and error. Pay close attention to how your baked goods respond, and don’t be afraid to make small adjustments. With practice, you’ll develop an intuitive sense for how long and at what temperature to bake, leading to beautifully crisp, evenly baked crusts every time.
Frequently Asked Questions
Can Adjusting Oven Racks Improve Heat Distribution?
Yes, adjusting oven rack positions can improve heat distribution. By placing your baking dish on different oven racks, you guarantee more even exposure to heat, helping prevent burnt crusts or undercooked centers. For instance, positioning your rack in the middle often provides the most balanced heat distribution. Experiment with different rack positions to find the ideal heat flow for your specific oven, guaranteeing your baked goods turn out perfectly every time.
What Are the Best Tools to Monitor Crust Temperature?
Imagine your crust glowing softly, a gentle heat telling you everything’s just right. Infrared thermometers are your quick, non-contact tools for instant surface temperature readings, perfect for checking crusts without disturbing your bake. Oven probe sensors, on the other hand, go deep, monitoring internal temperatures to prevent overbaking. Together, these tools help you precisely control your oven’s heat, ensuring perfectly baked crusts every time.
How Does Dough Hydration Affect Crust Burning?
Higher dough hydration makes the crust more prone to burning because it creates a thinner, more delicate surface that heats quickly. When you work with high-hydration dough, focus on proofing techniques that develop dough elasticity, ensuring even heat distribution. Proper hydration helps maintain crust color and texture, but too much can cause burning if the oven temperature isn’t carefully controlled. Adjust your baking time accordingly to prevent burnt crusts.
Are There Specific Recipes More Prone to Burnt Crusts?
Like a delicate dance, certain recipes are more prone to burnt crusts, especially those with thin crusts or high sugar content. You need to control oven temperature carefully and monitor crust thickness. Thin crusts and recipes with sugary toppings absorb heat quickly, risking over-browning. Adjust your oven’s top and bottom heat, and consider using lower temperatures or longer baking times to prevent burning while maintaining perfect crusts.
How Does Preheating Influence Heat Balance During Baking?
Preheating your oven sets the right oven temperature from the start, ensuring even heat distribution. This helps you maintain a proper heat balance during baking, preventing hot spots that can burn the crust. When you preheat adequately, you can stick to recommended baking duration, avoiding overexposure that leads to burnt edges. Proper preheating makes your baking more predictable, so the crust cooks evenly without getting burnt from uneven heat.
Conclusion
Now that you understand how vital it is to balance top and bottom heat, imagine the perfect crust forming—golden, crisp, and just right. But the real trick? Knowing when to turn up or down the heat as the bake progresses. Will you catch that moment before it’s too late? With a little practice, you’ll master the art of preventing burnt crusts. The secret’s in your hands—are you ready to access it?