TL;DR

Get baking supplies delivered free — and shop member deals
- Fast, free delivery on millions of items
- Access to Prime Big Deal Days deals on October 6–7
- Prime Video, Amazon Music and more included
Halloween-themed ice cream molds transform simple frozen desserts into spooky shapes like pumpkins, ghosts, and skulls. Choosing the right mold, material, and technique guarantees impressive results for your holiday treats.
Food-grade silicone molds are the easiest and safest choice for detailed, spooky ice cream shapes.
Choose simple, bold shapes for quick, clean results, reserving intricate designs for experienced bakers.
Proper freezing time and gentle unmolding techniques prevent cracks and breakage.
Layered, colorful, and dairy-free recipes are trending for visually stunning Halloween treats.
Store molds flat and dry to preserve their shape and ensure long-lasting use.
What Material Makes the Best Halloween Ice Cream Molds?
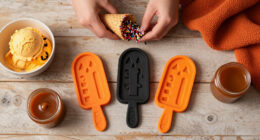
Choosing the right material is key to perfect Halloween treats. Food-grade silicone tops the list because it’s flexible, nonstick, and safe for the freezer. You can easily pop out a ghost or pumpkin without breaking it apart. Rigid plastic molds are budget-friendly and often come with reusable sticks, but treats can stick if you’re not careful. Metal molds create sharp, detailed shapes quickly but lack flexibility, making unmolding trickier. For example, a silicone mold shaped like a spider can be gently pulled away from the treat without fuss, while a metal one might require more finesse. Always look for BPA-free, food-safe options, especially when dealing with children’s treats. Material choice impacts how easy it is to get that perfect, clean shape and how durable your mold will be over time.
Halloween themed ice cream molds silicone
As an affiliate, we earn on qualifying purchases.
As an affiliate, we earn on qualifying purchases.
How to Pick the Perfect Shape and Detail for Your Halloween Ice Creams
Halloween molds come in all shapes — pumpkins, ghosts, bats, skulls, witches’ hats, and even tiny monsters. Simple shapes like pumpkins or ghosts tend to release easily and look adorable. More detailed molds, like a haunted skull with intricate carvings, create impressive visuals but require softer mixtures and careful filling. For example, a skull mold might need your ice cream to be soft enough to fill all the nooks without air pockets. Think about your skill level and the complexity of the design. If you want quick results, go for less detailed shapes. But if you’re ready for a challenge, detailed molds can wow everyone. Remember, the more detailed the mold, the more patience and gentle handling it needs during unmolding.
spooky Halloween ice cream mold shapes
As an affiliate, we earn on qualifying purchases.
As an affiliate, we earn on qualifying purchases.
Size Matters: How Big Should Your Halloween Ice Cream Treats Be?
Size affects both how long treats take to freeze and how much your guests will enjoy each one. Small molds, like miniature pumpkins or tiny ghosts, are perfect for kids, party favors, or sampling multiple flavors. Larger molds produce show-stopping desserts but need more time to freeze — often overnight. For example, a standard 3-inch pumpkin mold holds about 1/2 cup of ice cream, making it ideal for individual servings. A giant skull mold might hold 2 cups, perfect for a dramatic centerpiece but requiring patience. Always check the capacity before filling. Larger treats look impressive but can be tricky to unmold if they aren’t fully frozen. Think about your freezer space and how quickly you want to serve them.
As an affiliate, we earn on qualifying purchases.
Simple Tricks for Easy, Perfect Unmolding Every Time
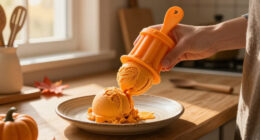
Getting your Halloween treats out without a mess is all about technique. First, don’t overfill the molds — leave a tiny gap at the top. Freeze until solid, usually 4-6 hours for small treats, overnight for larger ones. To release, briefly warm the outside of the mold with lukewarm water or let it sit at room temperature for a minute. Silicone molds are naturally nonstick, so gentle flexing does the trick. For rigid plastic or metal molds, be extra cautious — a quick warm-up helps. For example, a ghost-shaped ice cream can be popped out with a gentle squeeze, revealing a smooth, spooky figure. Avoid hot water or forceful pulling, which can crack or deform your treats. Patience and gentle handling are your best friends here.
food-grade silicone Halloween molds
As an affiliate, we earn on qualifying purchases.
As an affiliate, we earn on qualifying purchases.
Cleaning and Storing Your Halloween Molds for Spooky Success
Proper cleaning keeps your molds odor-free and ready for next time. Silicone molds are dishwasher safe—just check the label. For hand washing, rinse immediately after use with warm water and a soft brush to remove sticky residue. Deep details can trap bits of leftover ice cream or food, so gentle brushing helps. Dry thoroughly before storing, either flat or supported so they don’t bend. Rigid plastic molds should be washed carefully by hand to prevent warping. Store your molds in a cool, dry place. Keeping them flat or upright prevents deformation, especially for flexible silicone. For example, a spooky spider mold stored flat remains easy to fill and unmold for months of Halloween fun.
Ingredients and Texture: Making Your Halloween Treats Stay Perfect
The secret to smooth, shape-holding ice cream is choosing the right mixture. Recipes with enough sugar and fat freeze more solidly. Think cream, condensed milk, or coconut milk — they help keep the shape crisp. Water-based ice pops, like fruit juice, tend to get icy and hard. For a Halloween twist, add fruit purée, yogurt, or a dash of gelatin to improve texture. For example, a pumpkin-flavored sorbet with added cream will hold details better than plain fruit juice. Use a mixture that freezes firmly but remains easy to spoon or pour. This balance makes your spooky shapes sharp and recognizable.
Safety First: Keep Your Halloween Ice Cream Safe and Delicious
Safety is paramount when making frozen treats. Use molds labeled food-safe and BPA-free. Never pour hot liquids into molds unless they are heat-rated. Check silicone molds for tears or bad odors before use. Wooden sticks should be secure, and supervise children when handling frozen treats or small sticks. Always wash molds thoroughly after use to prevent mold and bacteria growth. For example, a ghost-shaped silicone mold used for a seasonal treat should be inspected for cracks before each use. Avoid cross-contamination by washing your tools and ingredients properly. Keeping safety in mind ensures your spooky treats are both fun and safe to eat.
Latest Trends in Halloween Ice Cream Molds — Why They’re Better Than Ever
Modern molds are more reusable, detailed, and versatile. Silicone molds dominate because they’re flexible and easy to unmold. Many are now designed for multiple uses—chocolate, gelatin, or even soap—adding value. Mini molds for small servings are popular for kids and party favors. Manufacturers also offer 3D skulls, monsters, and pumpkins with intricate details that look almost alive. Layered and colorful treats are trending, with bright orange, green slime, and purple berries inside transparent molds. Plus, plant-based recipes like coconut or oat milk make treats accessible for everyone. Social-media-ready designs with edible decorations turn simple frozen desserts into Halloween masterpieces. These innovations make your spooky treats more impressive and fun to make.
Top Tips for Perfect Halloween Ice Cream Shapes
- Lightly coat rigid molds with neutral oil if recommended.
- Don’t overfill cavities — leave a small gap at the top.
- Tap molds gently to release air bubbles, ensuring sharp details.
- Insert sticks before the mixture fully freezes for stability.
- Freeze on a flat surface to prevent warping and uneven shapes.
- Use gel food coloring sparingly to prevent affecting texture.
- Decorate after unmolding to keep details crisp and vibrant.
Frequently Asked Questions
Are silicone ice cream molds safe?
Yes, as long as they are labeled food-safe and BPA-free. They’re designed for freezing and are generally very safe for children’s treats when used properly.Do Halloween ice cream molds work with regular ice cream?
Absolutely. Slightly softened ice cream or gelato fills these molds easily, especially if the mixture is creamy and firm. For best results, freeze overnight.How long do shaped ice cream treats take to freeze?
Small treats typically freeze in 4-6 hours, while larger or thicker molds may need overnight to become perfectly firm.Why won’t my treats come out of the mold?
They may not be fully frozen or the mold might need a quick warm-up. Briefly run warm water over the outside or let it sit at room temperature for a minute, then gently flex.Can I make dairy-free Halloween ice cream treats?
Yes. Coconut milk, oat-based milks, or fruit sorbets work well. Just remember to adjust the recipe for enough fat and sugar to keep the shape crisp.Conclusion
Halloween ice cream molds aren’t just about fun—they’re about creating memorable, shareable moments. The right mold, combined with careful technique, turns simple frozen treats into spooky works of art. So, grab your favorite mold, get creative, and let your imagination run wild. Your next batch of jaw-dropping Halloween desserts is just a mold away.Fall Picks
fall essentials
As an affiliate, we earn on qualifying purchases.