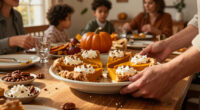
Use this guide to select and arrange serving platters for a Thanksgiving dessert spread. It is for a home host who wants guests to identify, reach, and serve desserts without crowding the table. The task is beginner-friendly and takes about 45-90 minutes, excluding baking and chilling time.

Get baking supplies delivered free with Prime
- Fast, free delivery on millions of items
- Prime Video, Amazon Music and more included
- Member-only deals all year

JarThenaAMCS Set of 3 Watercolor Fall Pumpkin Serving Trays, 10 x 13 in
- ✔ Brand: JarThenaAMCS
- ✔ Material: Melamine
- ✔ Quantity: 3 trays

Set of 3 Reusable Pumpkin Melamine Serving Trays
- ✔ Brand: R.HORSE
- ✔ Material: Food-grade melamine
- ✔ Pieces: 3 trays

Pfaltzgraff Autumn Berry Small Oval Stoneware Platter, 10.5-Inch, Cream
- ✔ Material: Stoneware
- ✔ Dimensions: 10.5 × 8.25 inches
- ✔ Shape: Oval
Difficulty: Beginner | Time: 45-90 minutes, plus chilling or baking time
What You’ll Need
Tools & Materials:
- Serving platters, cake stands, or trays sized for the desserts
- Small plates, dessert forks, serving utensils, and a pie server
- Food-safe labels or place cards and a pen
- A clear, stable serving surface
Knowledge:
- Basic awareness of which desserts need refrigeration
- A rough count of guests and planned desserts
Count the desserts and estimate portions before choosing platters. Check that each platter is clean, food-safe, stable, and large enough for the food without overfilling. Keep packaging or recipe notes for desserts containing common allergens so you can label them accurately.
JarThenaAMCS Set of 3 Watercolor Fall Pumpkin Serving Trays, 10 x 13 in
When Thanksgiving dessert means more than one dish, three 13-by-10-inch trays give us the most flexible setup in this group. We can use separate surfaces for cookies, brownies, and fruit, or place trays at different points on the table so guests are not reaching across one crowded platter. Compared with the smaller R.HORSE trays, these offer more listed area per tray; compared with the Pfaltzgraff, the set is better suited to variety than to presenting one small dessert with a traditional stoneware look.The watercolor pumpkin and floral design makes these feel intentionally seasonal without relying on the R.HORSE set’s more direct autumn pumpkin print. Their lightweight melamine construction is practical for carrying and storage, and the trays stack. The main compromise is care: these are hand-wash only, so cleanup takes more effort than with the R.HORSE set’s listed machine-washable trays. The provided details also do not establish microwave or oven suitability, so we should use them for serving rather than reheating.
Pros:
- Three trays provide separate serving surfaces for a varied dessert table.
- 13-by-10-inch dimensions are the largest listed in this comparison.
- Lightweight melamine is reusable and stackable for storage.
- Watercolor pumpkin and floral artwork suits a fall table.
Cons:
- Hand washing adds cleanup work after a large meal.
- Melamine serving trays are not specified as microwave- or oven-safe.
Best for: Hosts serving several types of cookies, bars, or small desserts who want three relatively large, coordinated surfaces.
Not ideal for: Anyone who prioritizes machine-washable cleanup or wants one substantial stoneware platter for a more formal presentation.
Bottom line: We’d choose this set for the most adaptable Thanksgiving dessert spread, provided hand washing is an acceptable tradeoff.
“We’d choose this set for the most adaptable Thanksgiving dessert spread, provided hand washing is an acceptable tradeoff.”
Set of 3 Reusable Pumpkin Melamine Serving Trays
The R.HORSE set takes a practical route to holiday hosting: three matching rectangular trays let us distribute sweets around the table, while the listed machine-washable care makes cleanup simpler than with the hand-washed JarThenaAMCS set. At 12.9 by 9 inches, each tray is slightly smaller than that top pick, so these make more sense for cookies, snack-size pastries, and modest dessert portions than for a large centerpiece cake or an expansive assortment.Its yellow autumn pumpkin print is an unmistakable Thanksgiving cue, which helps the trays contribute to a coordinated seasonal table. That same specificity is a limitation if we want serving pieces for everyday use. Compared with the Pfaltzgraff platter, this set gives us more serving stations and a lighter melamine format, but it does not offer the stoneware feel or listed microwave-safe use of that single platter. We should also treat these as serving trays: the supplied information confirms food-safe melamine but does not say they are suitable for reheating.
Pros:
- Three matching trays help organize a range of small desserts.
- Listed machine-washable care simplifies cleanup.
- Reusable food-grade melamine is suited to serving food.
- Rectangular trays stack and fit neatly on a table.
Cons:
- Each tray is smaller than the JarThenaAMCS trays.
- The pumpkin print is strongly seasonal and may see less use year-round.
- The listed dimensions may not accommodate larger desserts.
Best for: Hosts who want several matching seasonal trays and value the listed machine-washable care.
Not ideal for: Anyone needing a large platter for a whole cake, a year-round neutral design, or a stoneware serving piece.
Bottom line: We’d pick R.HORSE over the larger JarThenaAMCS set when easier listed cleanup matters more than extra tray area.
“We’d pick R.HORSE over the larger JarThenaAMCS set when easier listed cleanup matters more than extra tray area.”
Pfaltzgraff Autumn Berry Small Oval Stoneware Platter, 10.5-Inch, Cream
This Pfaltzgraff platter is the most compact and traditional option here. Its 10.5-inch oval stoneware surface suits a few slices of pie, a small batch of cookies, or a dessert passed around with coffee; it is not designed to cover the same range as either three-tray set. The fall leaves and nuts border and “Thankful” message make the holiday intent explicit, giving the platter a more keepsake-like table presence than the melamine options.Stoneware also brings a different kind of utility: this model is listed as microwave and dishwasher safe, unlike the melamine sets, though we should still confirm any use instructions supplied with the item. The tradeoff is serving capacity. Compared with the JarThenaAMCS trays, it gives us one small presentation surface instead of several larger ones; compared with R.HORSE, it has a more substantial material and a single-platter look, but less flexibility for separating desserts. Its seasonal motif may also feel out of place outside autumn gatherings.
Pros:
- Stoneware offers a more traditional feel than the melamine tray sets.
- Microwave-safe specification supports limited reheating use.
- Dishwasher-safe care is convenient after serving.
- Fall leaves, nuts, and a “Thankful” message suit a holiday table.
Cons:
- One 10.5-inch platter offers much less serving flexibility than either set of three.
- Small dimensions may not fit larger desserts or a broad assortment.
- The Thanksgiving-specific design is less versatile through the rest of the year.
Best for: Small gatherings or hosts serving a few dessert portions who prefer a traditional stoneware platter with a Thanksgiving message.
Not ideal for: Hosts presenting several desserts, a large pie, or a broad assortment that needs multiple serving surfaces.
Bottom line: We’d choose this platter for a small, composed dessert presentation, but the two melamine sets are better equipped for a full dessert spread.
“We’d choose this platter for a small, composed dessert presentation, but the two melamine sets are better equipped for a full dessert spread.”
As an Amazon Associate we earn from qualifying purchases.
Before You Start
Measure the available serving area and leave room for plates, utensils, and guests to reach the food. Keep hot dishes away from table edges, candles, and children. Refrigerated desserts should stay chilled until serving; do not leave perishable fillings at room temperature for more than two hours, or one hour if the temperature is above 90°F (32°C). Plan to bring them out in smaller batches if dessert service will last.
Step-by-Step Instructions
Step 1: List desserts and portions
Write down each dessert, the number of servings, and whether it needs to stay cold. Include pies, cookies, bars, cakes, and any sauces or toppings. Estimate portions from your guest count, allowing smaller pieces when guests can choose several desserts.
Tip:Keep a note of ingredients such as nuts, dairy, or gluten for labeling. Use reliable recipe or package information rather than guessing.
Check: You have a list of desserts, approximate serving counts, and any temperature or allergen notes.
Step 2: Match each dessert to a platter
Choose a platter or stand for each dessert. Use a flat, broad platter for cookies and bars, a stable cake stand for a whole cake, and a platter with enough depth or a rim for desserts that may shift. Set aside a pie server for pies and a separate utensil for each item.
Tip:A platter should leave enough space to lift a slice or piece without scraping other portions. Avoid balancing a heavy dish on a narrow stand.
Check: Every dessert has a suitable serving surface, and each item has an appropriate utensil.
Step 3: Prepare and label the platters
Wash and dry the platters, stands, and utensils. Add a food-safe label or place card beside each dessert with its name and useful ingredient or allergen details. Keep labels outside the food area so they do not touch edible portions.
Tip:If you are using a platter that previously held an allergen, wash it thoroughly with hot, soapy water and use a clean utensil. A label does not prevent cross-contact.
Check: The dishes are dry and clean, and guests can identify the desserts and relevant ingredient information.
Step 4: Portion desserts for easy serving
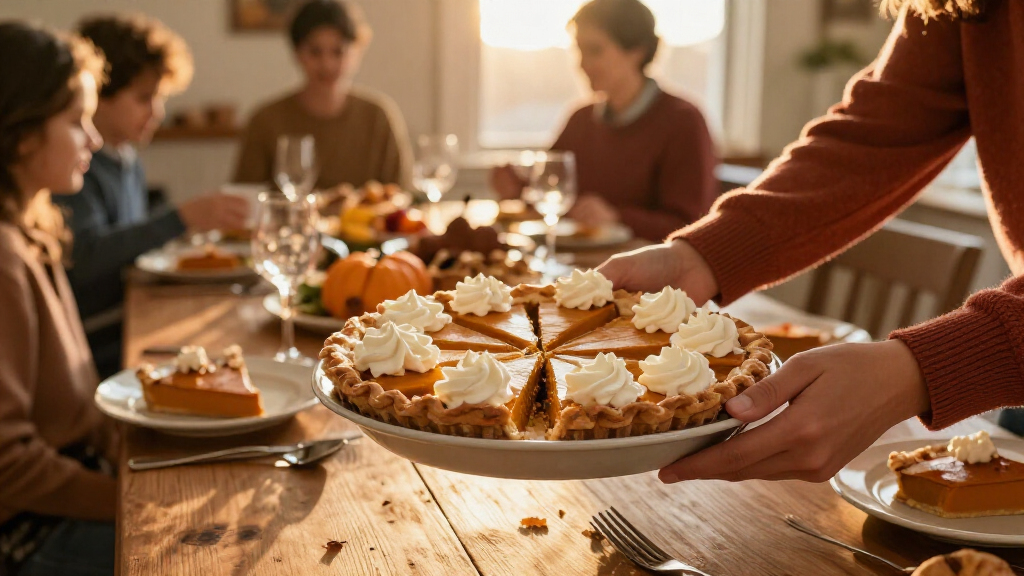
Cut pies, cakes, and bars into portions before setting them out when the recipe allows. Arrange the pieces with a little space between them, and position the serving utensil where a guest can pick it up without reaching across food. Leave cookies and small pastries in manageable groups rather than stacking them high.
Tip:For a neat pie presentation, wipe the knife between cuts. If a dessert is delicate, keep it whole and place the correct server beside it.
Check: Guests can take a portion without needing to move the platter or handle nearby food.
Step 5: Arrange the spread
Place platters on the serving surface with frequently chosen desserts easy to reach. Put taller stands toward the back and keep lower dishes toward the front. Leave clear gaps for plates and utensils, and group toppings or sauces beside the dessert they accompany.
Tip:Use a separate side table if the dining table is crowded. Keep hot drinks and open flames away from dessert platters.
Check: Each item is visible and reachable, and guests have room to serve themselves without knocking dishes together.
Step 6: Set out chilled desserts and serve
Keep chilled desserts in the refrigerator until serving time. Set out only what guests are likely to eat soon, then return perishable leftovers to the refrigerator within the safe time limit. Refill from a chilled reserve platter instead of leaving the full supply at room temperature.
Tip:Use a timer if dessert service will continue for a while. Follow any stricter storage directions from the recipe or food packaging.
Check: Cold desserts remain chilled until needed, and the serving area stays orderly as guests take portions.
Common Mistakes to Avoid
- Choosing platters before counting desserts or portions. — Make the dessert and serving list first, then match each item to a dish with enough usable space.
- Packing slices or pastries too tightly. — Leave room for serving utensils and fingers to remove a portion without disturbing the rest.
- Leaving perishable desserts out throughout the gathering. — Keep them refrigerated until needed, track serving time, and bring out smaller batches.
- Using one utensil for several desserts. — Set out a separate, clearly placed utensil for every platter to reduce mix-ups and cross-contact.
Troubleshooting
Problem: The serving table feels crowded.
Solution: Move drinks, extra plates, or some desserts to a nearby side table. Keep the most popular items accessible and preserve room for guests to reach each platter.
Problem: Pie slices break or stick when served.
Solution: Use a clean pie server and cut all the way through the crust before lifting. For a chilled pie, follow the recipe’s recommended resting time before slicing.
Problem: A platter rocks or slides on the table.
Solution: Move it to a flat, stable surface. Place a nonslip mat under the dish if appropriate, and move heavy or tall arrangements away from table edges.
Problem: Guests cannot tell which desserts contain allergens.
Solution: Add clear labels based on ingredient lists or recipe information, and use separate utensils. If ingredients are uncertain, do not claim the dessert is free of an allergen.
What Success Looks Like
The finished dessert area has a suitable platter and serving utensil for every item, clear labels, reachable portions, and enough space for guests to serve themselves. Chilled desserts are kept cold until service and returned to refrigeration within the safe time limit. Guests can identify each dessert without asking the host to explain every dish.
Next Steps
After dessert service, cover and refrigerate perishable leftovers promptly, following recipe or package storage directions. Wash and dry platters and utensils before storing them. For future gatherings, note which platter sizes and serving amounts worked well so you can prepare the setup more quickly.
Frequently Asked Questions
How many dessert platters do I need?
Plan for at least one serving surface per dessert, with extra dishes for toppings or desserts that need separate handling. If several small items can share a platter safely and guests can still identify them, one larger dish may work.
Should I cut pies before putting them on the table?
Cut a pie before serving if it holds its shape and you want guests to serve themselves quickly. For a fragile or warm pie, set out a pie server and cut slices as needed.
How can I keep dessert platters cold?
Keep perishable desserts refrigerated until serving and bring them out in small batches. For longer service, use a chilled tray or an ice-supported serving setup that is stable and suitable for the dish.
Can I use disposable platters?
Yes, if they are food-safe and sturdy enough for the dessert. Support a flimsy disposable platter with a tray underneath, especially when carrying a heavy cake or pie.