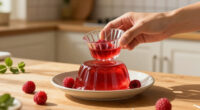
Make a gelatin dessert that releases cleanly from a decorative mold and keeps its shape when served. This beginner guide covers preparing the mold, dissolving gelatin, adding cold liquid, chilling, and unmolding. Allow about 20–30 minutes of active work, then at least 4 hours of chilling; a large mold may need 6 hours or overnight.

Get baking supplies delivered free with Prime
- Fast, free delivery on millions of items
- Prime Video, Amazon Music and more included
- Member-only deals all year

O’Creme Mini Cake and Flan Molds, 25 Pack
- ✔ Material: PET
- ✔ Quantity: 25 molds
- ✔ Shape: Round

HKNMTT Silicone Half-Sphere Molds, 15 Cavities, 2-Pack
- ✔ Material: Food-grade silicone
- ✔ Quantity: 2 molds
- ✔ Cavities: 15 per mold; 30 total

HUAKENER 2-Piece Mini Fluted Tube Cake Pan Set, 6 Cavities Each
- ✔ Material: Food-grade silicone
- ✔ Quantity: 2 pans
- ✔ Cavities: 6 per pan; 12 total
Difficulty: Beginner | Time: 20–30 minutes active time, plus 4–6 hours to chill
What You’ll Need
Tools & Materials:
- Decorative gelatin mold, preferably with a smooth interior
- Measuring cup and measuring spoons
- Heat-safe bowl or saucepan
- Whisk or spoon
- Refrigerator with a level shelf
- Serving plate larger than the mold
Knowledge:
- Basic measuring and safe handling of hot liquid
Check the gelatin package for its liquid ratio and setting time. These vary by product and mold size. For a first attempt, use a standard gelatin dessert recipe without fresh pineapple, kiwi, papaya, figs, or guava; enzymes in these fruits can prevent gelatin from setting unless the fruit has been cooked or canned.
O’Creme Mini Cake and Flan Molds, 25 Pack
For gelatin served in familiar, individual rounds, O’Creme’s 25 lightweight cups are the most direct fit in this lineup. Each is listed at 11.5 fluid ounces, making these considerably more substantial than HKNMTT’s 1.5-inch half-spheres. That larger format works well when we want a molded dessert that can stand on its own as a serving, rather than a small garnish or bite.The PET molds are described as reusable, freezer compatible, and oven safe, so the set can span flan, chilled gelatin, and mini cakes. Compared with the two silicone options, though, these are rigid cups rather than flexible molds; they do not offer the same stated nonstick release advantage. Hand washing also adds work across 25 pieces. One detail needs care: the listed maximum temperature varies between 375°F and 400°F, so these are easiest to recommend for gelatin and chilled desserts, and any baking use should follow the lower limit unless the packaging clarifies it.
Pros:
- 25 molds support large batches of individual desserts.
- 11.5-fluid-ounce capacity suits a more substantial serving.
- Listed for freezer use and oven use within the stated range.
- Lightweight PET construction is described as reusable and recyclable.
Cons:
- Hand wash only, which can be tedious across 25 molds.
- The listed maximum temperature conflicts between 375°F and 400°F.
- Rigid cups may not release molded gelatin as readily as flexible silicone.
Best for: People making many individual servings of gelatin or flan who prefer round, relatively large portions.
Not ideal for: Anyone who prioritizes dishwasher cleanup, very easy flexible release, or small decorative shapes.
Bottom line: Choose O’Creme when a large batch of classic round gelatin servings matters more than flexible release or dishwasher cleanup.
“Choose O’Creme when a large batch of classic round gelatin servings matters more than flexible release or dishwasher cleanup.”
HKNMTT Silicone Half-Sphere Molds, 15 Cavities, 2-Pack
When presentation calls for small domes rather than full cups, HKNMTT’s 30 half-sphere cavities offer the most distinctive shape here. Each 1.5-inch cavity makes a compact portion suited to party trays, layered desserts, or decorative accents. That specialization sets it apart from O’Creme’s larger rounds and HUAKENER’s fluted tube shapes: this is the set to consider when the visual form and bite-sized scale matter most.Flexible, nonstick silicone is a practical advantage for releasing chilled gelatin, and the stated temperature range spans freezer and oven use. But the cavities are only 0.7 inches deep, so they are limited in volume and do not create a full sphere. Compared with HUAKENER’s deeper 1.5-inch fluted cavities, these give us a smaller, simpler piece; compared with O’Creme, far less gelatin per portion. Choose them for small-format desserts, and skip them if guests need a full individual serving from each mold.
Pros:
- 30 cavities across two molds support a generous count of small pieces.
- Flexible nonstick silicone can help release gelatin cleanly.
- BPA-free food-grade silicone is specified.
- Stated range supports freezer and oven use.
Cons:
- The 1.5-inch diameter creates small portions.
- At 0.7 inches deep, cavities make half-spheres rather than full spheres.
- Small pieces may take more effort to fill and handle individually.
Best for: Hosts and home cooks making compact half-sphere gelatin bites, decorative toppings, or assorted small treats.
Not ideal for: Anyone who wants full-size individual gelatin servings or a deep, enclosed shape.
Bottom line: Pick HKNMTT for decorative, bite-size half-spheres when portion size is deliberately compact.
“Pick HKNMTT for decorative, bite-size half-spheres when portion size is deliberately compact.”
HUAKENER 2-Piece Mini Fluted Tube Cake Pan Set, 6 Cavities Each
HUAKENER’s fluted tube cavities give molded gelatin a more decorative, cake-like profile than either the simple O’Creme rounds or HKNMTT half-spheres. Two pans with six cavities apiece make 12 desserts at once, a useful middle ground for a family table or small gathering. The 1.5-inch listed depth also offers a taller shape than HKNMTT’s shallow half-spheres, though the stated 12-cup capacity is for the set rather than each cavity.This is the lineup’s strongest choice if we want one mold set for gelatin and baked mini cakes. It is specified as oven, microwave, refrigerator, and dishwasher safe, giving it broader stated kitchen use than O’Creme’s hand-wash-only PET cups. In exchange, silicone pans can flex when full, so support them on a tray while moving. HKNMTT supplies more cavities—30 versus 12—but HUAKENER’s deeper fluted format is better suited to a formed dessert that should look like a miniature cake. Its upper temperature limit is 446°F, which should be observed for oven use.
Pros:
- 12 fluted cavities make a distinctive individual dessert shape.
- Food-grade silicone is listed for oven, microwave, refrigerator, and dishwasher use.
- Nonstick surface is intended to aid release and cleanup.
- Can serve both gelatin-making and mini cake baking needs.
Cons:
- Flexible pans need support when moved while filled.
- 12 cavities make fewer pieces than HKNMTT’s 30 small cavities.
- The stated maximum temperature is 446°F.
Best for: Cooks who want fluted individual gelatin desserts and also plan to bake mini cakes or other treats in the same pans.
Not ideal for: Anyone seeking the highest cavity count, rigid cups that are easy to carry filled, or simple round portions.
Bottom line: Choose HUAKENER when fluted presentation and baking versatility outweigh the need for the largest batch.
“Choose HUAKENER when fluted presentation and baking versatility outweigh the need for the largest batch.”
As an Amazon Associate we earn from qualifying purchases.
Before You Start
Wash and dry the mold. Set it on a small tray before filling so you can move it without sloshing. Clear a level refrigerator shelf with enough room for the tray and mold. Do not grease the mold: a thin film can leave the dessert oily and may make the surface uneven. If the mold has many narrow details, check that it is clean and dry in its grooves.
Step-by-Step Instructions
Step 1: Measure the mold’s capacity
Fill the mold with water, then pour the water into a measuring cup to find its capacity. Compare that amount with the total liquid called for on the gelatin package. If the recipe makes more than the mold holds, reserve the excess for a small cup rather than overfilling.
Tip:Leave a little space at the rim so the gelatin does not spill when you move the mold.
Check: You know how much prepared gelatin will fit, and the mold is empty and dry.
Step 2: Prepare the gelatin mixture
Follow the package or recipe directions for the hot liquid and gelatin amount. Sprinkle powdered gelatin evenly over the specified cold water if the directions call for blooming it; let it stand for the stated time, usually a few minutes. Add the hot liquid and stir until no granules remain. For a gelatin dessert mix, dissolve it in the amount of boiling water stated on the package, stirring until completely clear.
Tip:Do not use less liquid simply to make the dessert set faster. Too little liquid can produce a rubbery texture, while undissolved granules can leave gritty spots.
Check: The mixture looks evenly colored and clear, with no visible grains at the bottom of the bowl.
Step 3: Add the remaining liquid and flavorings
Stir in the specified cold water or other liquid. Add drained fruit or other additions only if the recipe allows them, and distribute pieces evenly. Use canned or cooked versions of enzyme-rich fruits such as pineapple and kiwi. Let the mixture cool until warm rather than hot before pouring, especially if the mold is thin plastic.
Tip:Cut fruit into small pieces so it does not block narrow mold details or make the dessert difficult to slice.
Check: The mixture is evenly mixed and cool enough to handle without steaming.
Step 4: Fill the mold
Place the mold on its tray and pour the mixture slowly into the deepest area. Stop just below the rim. If bubbles collect on top, gently pop them with a spoon or skim them away. Carry the tray with both hands and set it on the level refrigerator shelf.
Tip:Pouring slowly helps prevent bubbles from becoming visible marks on the finished surface.
Check: The mold is steady, not overfilled, and the liquid surface sits level in the refrigerator.
Step 5: Chill until fully set
Refrigerate the mold for the package’s recommended time, generally at least 4 hours for a standard mold. Leave it undisturbed while it sets. For a deep or large mold, allow 6 hours or overnight. Do not put it in the freezer to speed up setting; freezing can damage the texture when it thaws.
Tip:If you need to check firmness, touch the edge lightly after the minimum setting time. The dessert should feel firm and spring back rather than leave a wet indentation.
Check: The surface and center feel set, and the dessert does not ripple when you gently move the tray.
Step 6: Loosen the edges
Remove the mold from the refrigerator. Dip the outside of the mold briefly in warm water, keeping water below the rim. Start with about 5–10 seconds; use a shorter dip for a thin mold. Run a clean fingertip gently around the edge to separate the gelatin from the mold where you can reach it.
Tip:A short warm-water dip is safer than prolonged heating. If the mold feels warm or the edge begins to melt, stop and chill it again briefly.
Check: The edge begins to pull away from the mold, while the dessert remains firm.
Step 7: Unmold onto a serving plate
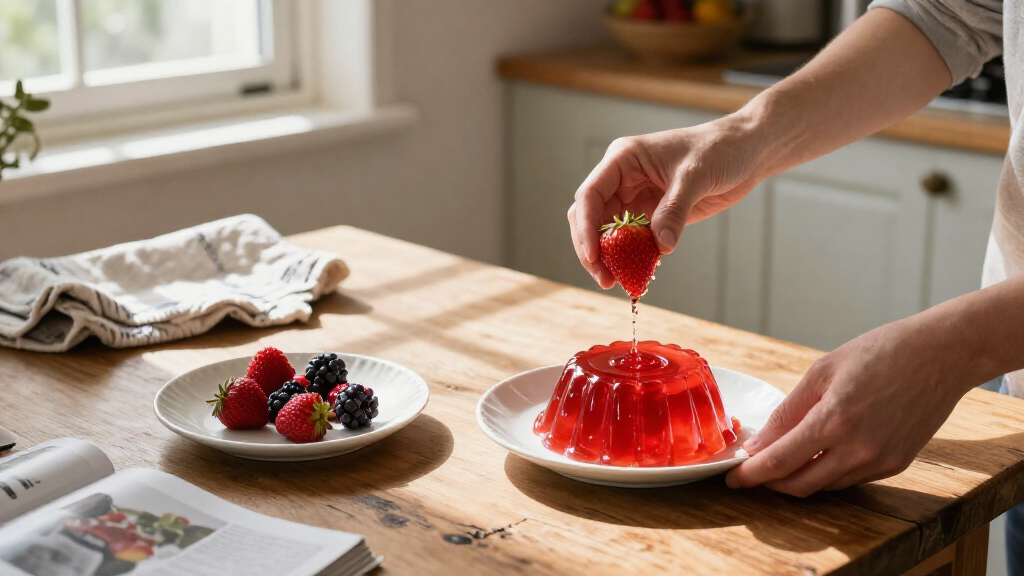
Place a serving plate upside down over the mold. Hold the plate and mold together, then invert them in one controlled motion. Lift the mold slowly. If the gelatin stays inside, return it to the upright position and dip it in warm water for a few more seconds before trying again.
Tip:Use a plate with a flat center and enough room around the dessert to catch any liquid.
Check: The dessert releases in one piece, with its details visible and no large tears.
Step 8: Serve and store the dessert
Keep the unmolded dessert refrigerated until serving. Slice it with a clean knife, wiping the blade between cuts for neat portions. Refrigerate leftovers in a covered container and follow the recipe or package storage guidance; discard the dessert if it has been left at room temperature for more than 2 hours.
Tip:For a cleaner first slice, dip the knife in warm water and dry it before cutting.
Check: Slices hold their shape, and the remaining dessert stays covered and cold.
Common Mistakes to Avoid
- Pouring gelatin into the mold before it has fully dissolved. — Stir until the liquid is clear and check the bottom of the bowl for grains before adding it to the mold.
- Using fresh pineapple, kiwi, papaya, figs, or guava without cooking them. — Use canned or cooked fruit, or choose fruit known to work with gelatin, such as berries or peaches.
- Freezing the mold to shorten chilling time. — Refrigerate for the full setting time; freezing can make gelatin watery or grainy after thawing.
- Holding the mold in hot water too long before unmolding. — Use brief warm-water dips, starting with 5–10 seconds, and repeat only as needed.
Troubleshooting
Problem: The gelatin is still liquid after the expected chilling time.
Solution: Check that the refrigerator is cold and the mold is not unusually deep. Chill longer. If it remains liquid, the gelatin may not have dissolved fully, the liquid ratio may be too high, or enzyme-rich fresh fruit may have prevented setting.
Problem: The dessert sticks when you invert the mold.
Solution: Set the mold upright again and dip its outside in warm water for a few more seconds. Gently loosen the rim, then invert over the plate once more.
Problem: The dessert tears or loses detail during release.
Solution: Chill it longer if it feels soft. If it is firm, warm the mold briefly and release the edge gently. Avoid pulling on the dessert or using a knife against detailed mold surfaces.
Problem: Bubbles or fruit pieces appear unevenly distributed.
Solution: Skim bubbles before chilling. For fruit, let the mixture cool until slightly thicker, then fold in small, evenly cut pieces just before filling.
What Success Looks Like
The gelatin has a smooth, set surface and releases onto the plate as one piece. It holds the mold’s details, does not leak liquid, and cuts into portions that keep their shape. A clean release and firm slices show that the dessert chilled long enough and the mixture was prepared correctly.
Next Steps
Refrigerate the dessert until serving and return leftovers to a covered container promptly. Wash the mold with warm, soapy water after use, taking care around fine details, then dry it fully before storing. For another batch, adjust the flavor or add permitted fruit while keeping the liquid-to-gelatin ratio from the recipe.
Frequently Asked Questions
How long does a gelatin dessert need to set in a mold?
Plan on at least 4 hours for a standard mold. Large or deep molds may need 6 hours or overnight. Follow the package or recipe timing and check that the center feels firm.
Should I grease a gelatin mold?
No. A clean, dry mold usually releases with a short warm-water dip. Grease can leave an oily film on the dessert.
Can I use fresh fruit in gelatin molds?
Most berries and stone fruits work when prepared as directed. Fresh pineapple, kiwi, papaya, figs, and guava contain enzymes that can stop gelatin from setting. Use canned or cooked versions of those fruits.
What if my gelatin will not come out of the mold?
Set the mold upright and dip its outside in warm water for a few seconds, keeping water below the rim. Loosen the edge gently and invert again. Repeat with short dips rather than heating the mold for a long time.