
TL;DR
In small closets, the key isn’t just foam — it’s strategic placement, sealing gaps, and managing heat. Moving your rig to a different room often beats elaborate treatments, and proper airflow is critical for long-term usability.
Ever wonder why your closet sounds less echoey but still leaks noise? It’s because small spaces naturally cut reflections and focus sound, yet they rarely block outside noise or handle heat well. The real magic comes from knowing where to place your gear and how to treat the space smartly.
This guide breaks down the most effective ways to turn a tiny closet into a usable, even professional-sounding, recording spot. You’ll learn why distance is king, how to treat reflective surfaces, and the importance of sealing gaps—plus how to keep your rig cool in a confined space. For more tips, see this guide on acoustic treatment.
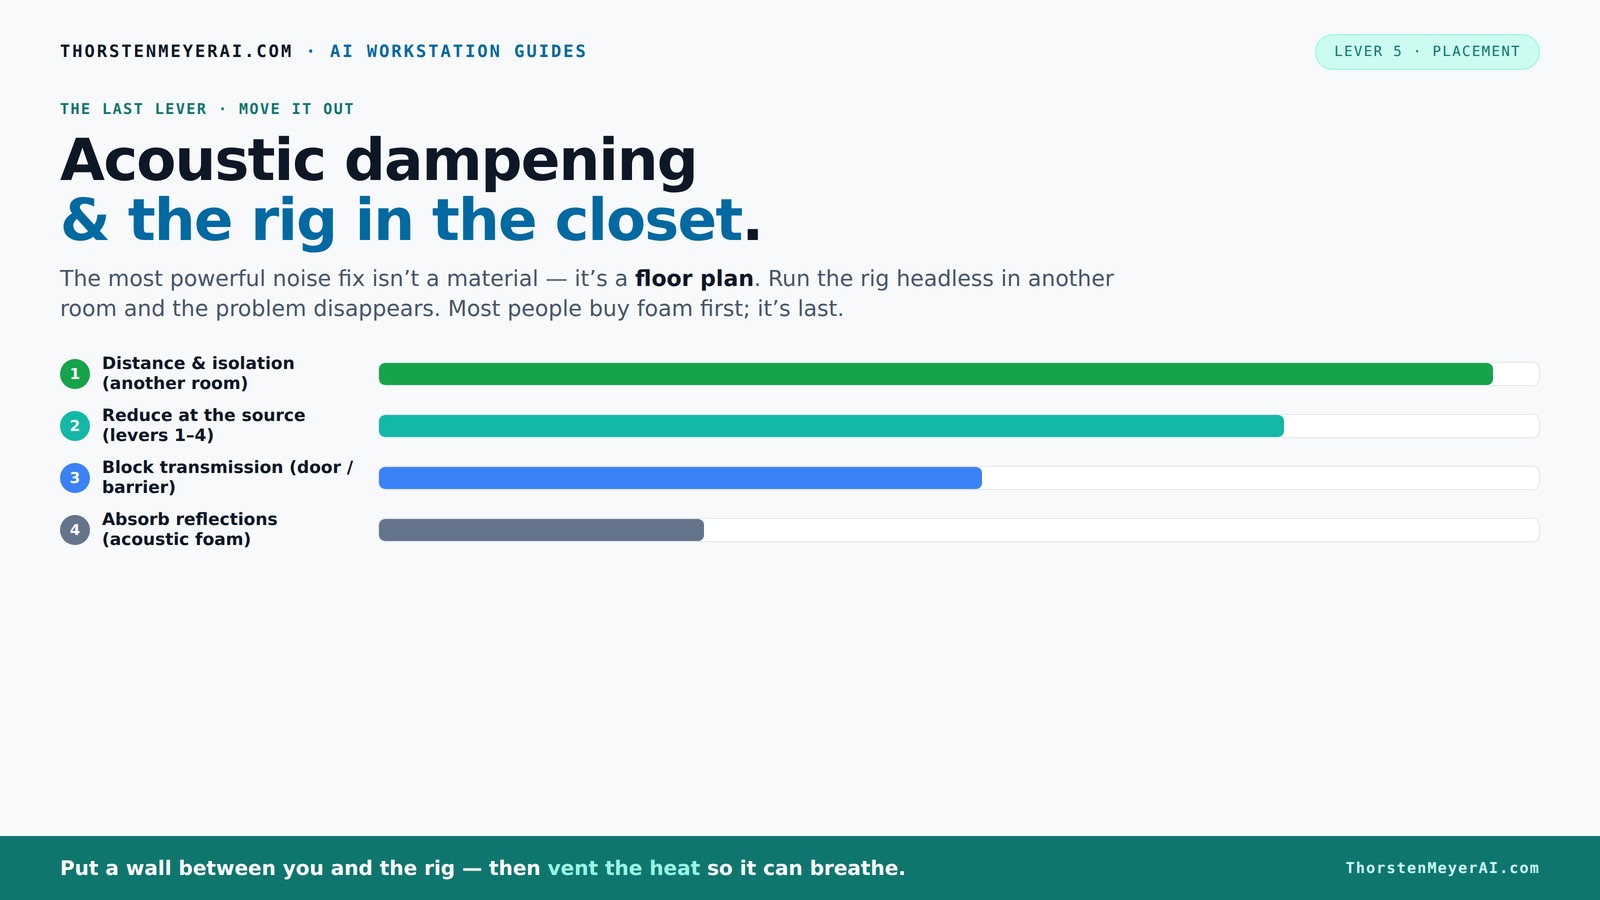
Acoustic dampening
& the rig in the closet.
The most powerful noise fix isn’t a material — it’s a floor plan. A rig you can’t hear because it’s in another room beats any amount of foam. Tap the approaches in Part 1 to see what actually works.
(another room)
(levers 1–4)
(door / barrier)
(acoustic foam)
Contain the noise, not the heat
Key Takeaways
- Move your rig to another room whenever possible; it’s the most effective noise reduction.
- Seal gaps around doors and outlets before adding foam or blankets for real soundproofing.
- Use bass traps in corners to prevent low-end buildup and improve vocal clarity.
- Prioritize placement—position microphones and absorption panels at reflection points for best results.
- Ventilate your closet properly to avoid heat buildup, especially if the space is sealed or enclosed.

Focusound 52 Pack Acoustic Foam Panels 1" x 12" x 12" Sound Proof Foam Panles Soundproofing Noise Cancelling Wedge Panels for Home Office Recoding Studio with 300PCS Double-Side Adhesive
Soundproofing - Acoustic foam panels triangular grooves structure for better noise absorption, helps to reduce and absorb unwanted...
As an affiliate, we earn on qualifying purchases.
As an affiliate, we earn on qualifying purchases.
Why Moving Your Rig Is the Easiest Way to Quieten Your Space
The best soundproofing is moving your hardware away from you. When your AI or music rig lives in another room—say, a closet or basement—the noise simply stops bothering you. You use your network or remote desktop, and the loud fan noise becomes a non-issue.
Imagine working on a high-powered AI model. Instead of fighting the noise on your desk, you SSH into a machine in a closet in the back of the house. The noise is gone, and your workflow remains smooth. This approach saves money, effort, and frustration—plus, it’s way more effective than slapping foam on your desk.
Strategically, this method minimizes the need for complex acoustic treatments in your main workspace. It shifts the focus from soundproofing to effective remote operation, which is often more practical and cost-efficient, especially for those with limited space or budget constraints.
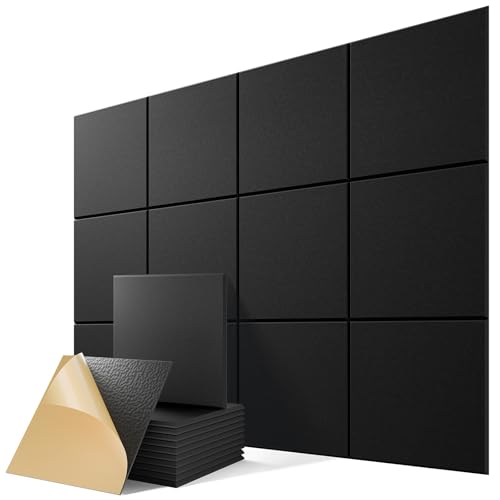
12 Pack Self-Adhesive Acoustic Panels, 12" X 12" X 0.4" High-Density Sound Proof Foam Panels for Walls, Soundproof Wall Panels for Home & Office (Black)
Superior Noise Reduction & Echo Cancellation - Tired of background noise and poor acoustics? Our soundproof wall panels...
As an affiliate, we earn on qualifying purchases.
As an affiliate, we earn on qualifying purchases.
The ‘Rig in the Closet’ Setup: How Ventilation Keeps It Cool and Quiet
Placing a hot, noisy rig in a closet is a clever move, but it’s a double-edged sword. Without proper ventilation, heat builds up fast, causing thermal throttling—where your hardware slows down to prevent overheating—and loud fan noise as the system struggles to cool itself. Over time, this can lead to hardware failure or reduced performance.
The key is to give your machine a dedicated airflow path. Using active ventilation—such as small exhaust fans or ducted vents—can significantly improve thermal management. For instance, a quiet 80mm fan pushing hot air out while drawing in cooler air maintains optimal operating temperatures. This not only reduces noise from fans but also prolongs your hardware’s lifespan. Learn more about proper ventilation techniques.
Sealed soundproof cabinets with ducted airflow are another advanced option, combining noise isolation with effective cooling. Proper ventilation reduces the risk of heat-induced noise and hardware damage, ensuring your system remains reliable during long sessions. For detailed techniques, see this guide on creating a quiet, cool enclosure.

TroyStudio Portable Vocal Booth, Large Foldable Microphone Isolation Shield, Music Recording Studio Sound Echo Absorbing Box, Desk & Stand Use Reflection Filter with Thickened Dense Acoustic Foam
【BASIC INFO】: Inside size after setup: 8'' (L) X 10'' (W) X 12'' (H), large space for various...
As an affiliate, we earn on qualifying purchases.
As an affiliate, we earn on qualifying purchases.
Acoustic Dampening vs. Soundproofing: What's the Real Difference?
Acoustic dampening and soundproofing are often confused, but they serve different purposes with significant implications. Dampening reduces echo and internal reflections—think of it as softening the sound within the space—by absorbing sound energy. This results in clearer recordings and less reverb, especially important in small rooms where reflections bounce around easily.
Soundproofing, on the other hand, is about preventing sound from escaping or entering the room. It involves adding dense barriers—like mass-loaded vinyl or dense drywall—and sealing all gaps to block external noise and prevent your recordings from leaking out. Without proper soundproofing, even a well-damped room can still leak noise, compromising privacy or causing disturbances.
Understanding this distinction helps in planning your treatment. For example, foam panels absorb reflections but do little to block sound transmission. Sealing gaps with weatherstripping and adding mass in walls prevents leaks. For more on soundproofing, see this article about sealing gaps.

Primacoustic London 10 - Black
Acoustic Room Treatment Kit with Eight Control Columns
As an affiliate, we earn on qualifying purchases.
As an affiliate, we earn on qualifying purchases.
Where to Place Acoustic Panels for Maximum Effect in a Tiny Closet
Placement is crucial because it directly affects how well your treatment reduces reflections. The first step is to position your microphone at its ideal spot—usually about 6-12 inches from the wall behind it—so that it captures a direct sound with minimal early reflections. For more on optimal placement, see this guide on acoustic panel placement.
Next, identify the primary reflection points: the wall opposite your mic, the ceiling, and the door. Use a mirror held at the mic height to find where sound bounces back—these are your reflection spots. Adding panels or foam at these points prevents sound from bouncing directly into the mic, dramatically improving clarity.
In small spaces, heavier, 2-inch thick panels are effective at absorbing a broad frequency range, including some low-end energy. For best results, treat all major reflection points systematically. Experiment with placement—sometimes even small adjustments can significantly reduce reverb and echo, making your recordings sound more professional.
Bass Traps and Corners: Why Low-End Buildup Happens & How to Fix It
Small rooms inherently concentrate low-frequency energy in the corners due to boundary effects—where walls, floor, and ceiling meet—causing a buildup of bass that results in a boomy, muddy sound. To combat this, consider installing bass traps in the corners.
Bass traps are specialized acoustic panels designed to absorb these low frequencies. Placed in the corners, they act like sponges for bass energy, preventing it from bouncing around and accumulating. This results in a more balanced, natural sound, especially noticeable in vocals and instruments.
Even simple DIY bass traps—constructed from rockwool or fiberglass—can be highly effective. The key is to fill the corners with thick, dense material, ideally in a triangular shape that fits snugly. Proper placement reduces low-end muddiness, improves clarity, and creates a more accurate listening environment. Without traps, small rooms often sound boomy and less controlled, making it harder to achieve professional-quality recordings.
How to Seal Doors, Cracks, and Openings Without Breaking the Bank
Sound leaks primarily through gaps—around doors, window frames, electrical outlets, and vents. These small openings can dramatically reduce your room’s isolation, making your efforts at treatment less effective. Sealing these gaps is a cost-effective way to enhance soundproofing without major renovations.
Using weatherstripping around door frames creates a flexible, airtight seal that prevents sound from escaping or entering. Applying acoustic sealant or foam tape on cracks and gaps further blocks noise paths. For the door’s bottom gap, a draft stopper or a heavy moving blanket can serve as an effective barrier.
This approach is especially important in small, enclosed spaces like closets, where even tiny leaks compromise your acoustic environment. A recent DIY example showed that sealing every crack with weatherstripping reduced noise leakage by over 50%, significantly improving sound isolation. It’s a simple step that yields substantial results, especially when combined with internal treatments.
DIY Materials That Make a Big Difference—Foam, Blankets, Rugs
Improving your closet’s acoustics doesn’t have to be expensive. Heavy blankets, moving pads, and thick rugs are excellent DIY options for absorbing reflections and reducing echo. Their effectiveness lies in their mass and density, which dissipate sound energy.
For example, hanging a thick moving blanket over a wall or door can dramatically cut early reflections, making vocals clearer. Placing rugs on the floor minimizes bouncing sound and footstep noise, which is crucial in small, enclosed spaces. Layering multiple blankets or adding thick curtains can further enhance absorption.
Combine these with affordable foam panels—2-inch thick panels are a good starting point. Strategically placing them at reflection points or corners maximizes their impact. This cost-effective approach can turn a noisy, echo-prone closet into a much more controlled environment, suitable for high-quality recordings without breaking the bank.
Common Mistakes to Avoid When Soundproofing a Closet Studio
Many DIY enthusiasts focus solely on adding foam panels or treating only the corners, expecting dramatic improvements. However, sound leaks through the smallest gaps—around doors, vents, and electrical outlets—rendering superficial treatments ineffective. Sealing these leaks first is essential because sound will find any weakness in your defenses.
Ignoring ventilation is another common mistake. Without proper airflow, heat can build up rapidly, causing thermal throttling, increased fan noise, and potential hardware damage. This not only affects performance but can also introduce additional noise sources.
Relying only on absorption panels without addressing sound blocking leaves your space vulnerable to external noise. For example, a user who installed foam but didn't seal the door edges discovered persistent noise leaks. The solution involves sealing all gaps, adding mass where needed, and incorporating ventilation solutions. This comprehensive approach ensures your efforts in treatment and sealing work together for a quieter, more controlled environment.
Can a Closet Studio Handle Vocals, Podcasts, or Music? Here’s What to Expect
A closet can be an effective space for vocals and podcasts, especially if you treat it properly. It reduces early reflections and echoes, making your voice sound more focused and professional. However, it’s not a perfect soundproof booth for loud music or live instruments, which generate more sound energy and require more extensive treatment.
Expect some leakage and low-end buildup if you don’t treat corners and openings thoroughly. For voice-over and podcasting, a well-treated closet with proper placement can produce excellent results, often rivaling more expensive setups. For music production, especially with louder instruments, you’ll likely need additional bass trapping and possibly a larger, dedicated space to prevent issues like low-end boominess and external noise intrusion.
Many podcasters successfully record in closet booths by sealing gaps, adding bass traps, and positioning microphones carefully. They balance practicality and sound quality, accepting some limitations. Understand that while a closet can be a great starting point, achieving studio-grade isolation and sound quality involves tradeoffs and ongoing adjustments.
Frequently Asked Questions
Can I make a closet fully soundproof?
Complete soundproofing is tough in small spaces. You can significantly reduce noise with sealing, dense barriers, and insulation, but perfect isolation is nearly impossible without professional construction. Focus on sealing gaps, adding mass, and incorporating effective ventilation to maximize your room’s acoustic isolation.
What’s the difference between acoustic treatment and soundproofing?
Acoustic treatment reduces echo and reflections inside a room, making vocals clearer and more natural. Soundproofing blocks sound from entering or leaving, requiring dense barriers and sealing techniques—think of it as a noise shield. Both are essential but serve different functions; combining them yields the best results, especially in small, enclosed spaces.
Where should I place panels in a closet studio?
Place panels behind the mic at reflection points, which you can find using a mirror at mic height. Treat side walls and the ceiling similarly, focusing on areas where sound bounces directly into your mic. Corners benefit from bass traps to control low-end buildup. Systematic placement based on reflection points ensures a balanced, professional sound.
Do bass traps help in a closet booth?
Yes. Bass traps absorb low-frequency energy that tends to concentrate in corners, preventing a boomy or muddy sound. Properly placed bass traps lead to clearer vocals and more accurate monitoring, essential for professional-quality recordings in small spaces.
How important is ventilation for a closet rig?
Very important. Without proper airflow, heat builds up quickly, causing thermal throttling and increased fan noise, which can interfere with recordings. Using passive vents or quiet exhaust fans helps maintain stable temperatures and reduces noise from overheating, ensuring your equipment runs smoothly and quietly.
Conclusion
Transforming a closet into a usable recording space is all about smart placement, sealing gaps, and managing heat. Moving your rig elsewhere might be the simplest and most cost-effective fix, but if you must keep it in the closet, focus on sealing, proper treatment, and airflow.
With a little effort, your tiny space can produce clean, focused vocals and even serve as a decent platform for podcasts or voiceovers. Remember: the best soundproofing isn’t just foam—it's what’s behind the walls, around the door, and under your feet.